Setup Wizard
New to Couch Co-op Builder? Begin with Chapter 2 — Requirements, Installation and Quick Start. This guide explains setup actions, saving and reruns, then points to concrete examples. Player capacity is explained in Player scope; default lobby controls are in Chapter 2.
Setup Wizard
Open Tools > LevelArgento > Couch Co-op Builder > Setup Wizard. Its six steps are Start, Characters, Lobby UI, Gameplay, Cameras, Review, followed by completion.
| Step | What to choose / provide |
|---|---|
| Start | Create New Lobby copies supplied authored UI; Integrate Existing Canvas wires your saved UI. No setup preset is saved. |
| Characters | A nonempty Character Catalog, stable unique Character IDs, and Maximum Local Players. Generate from Prefabs... opens the generator; assign the resulting catalog afterward. |
| Lobby UI | New Lobby: Individual Panels, Shared Stage or Character Carousel, an existing Assets folder and a new Lobby Asset Name. Existing Canvas: assign authored controls as described in Chapter 5 — Lobby Templates and Existing Canvas. |
| Gameplay | Saved Gameplay Scene, enabled in the project scene list. The current Wizard button Add Gameplay Scene to Build Settings registers it immediately through EditorBuildSettings.scenes; this changes project scene configuration, not the scene asset. Use Open Gameplay Scene Additively and Select Gameplay Player Setup in Inspector for representation configuration. Gameplay input is a separate choice on each Gameplay Player Binding. |
| Cameras | Optional Enable Shared / Split Screen Camera Management. Assign your gameplay setup and camera source; choose 2P/3P layouts. 4–8 are automatic. See Split Screen Cameras. |
| Review | Correct blocking errors; inspect paths, scene wiring, asset saves and project scene-list changes, then Apply Setup. |
The built-in character-selection lobby requires a catalog that passes Run Catalog Validation, including Gameplay Prefabs. The Wizard can show a missing-prefab warning without blocking Apply; that warning does not mean lobby confirmation will work. Assign those prefabs before testing character selection. API-only gameplay metadata lookup has a separate, looser contract; see Gameplay Integration.
Outputs and completion
Create New Lobby copies the chosen authored prefab to your output folder and creates a scene using that editable copy. It assigns catalog/capacity/destination, disables unused supplied slots, and registers the lobby in the project scene list. Source templates remain unchanged. Existing scene/prefab paths are never overwritten. Choose an existing folder under Assets using Browse...; create your own folder in the Project window first if needed.
Integrate Existing Canvas wires required references and adds/reuses nonvisual services, input contexts and previews. It preserves authored positions, fonts, colors, sprites and layout. The lobby scene is marked dirty, not automatically saved. Optional camera wiring also marks the gameplay scene dirty; save it after Apply. Missing/duplicate required references and wrong-scene/hierarchy assignments are reported before applying.
Completion lists the applied workflow, capacity/catalog, lobby/gameplay paths and integration choices. Use Open Lobby Scene, save, then Test Lobby in Play Mode; the test action is enabled only when that lobby is active. Select the catalog or the copied prefab when customizing content. Open gameplay and follow Chapter 7 — Gameplay Representation and Spawning and Chapter 8 — Gameplay Input Integration to supply your game-owned objects, movement and input. Confirm all joined players and test shared Start and return to the originating lobby.
Scene wiring supports Edit > Undo. Created disk assets and project scene-list registration are separate saved changes, not guaranteed to reverse with scene Undo. Review identifies any operation that saves other dirty assets. Failed New Lobby creation removes its own partial outputs.
Run setup again
Start Another Setup clears only temporary Wizard choices. It does not remove previous scenes/assets. A new lobby needs a new name/folder. To update a configured lobby, choose Existing Canvas, assign its Canvas, and review the suggested player bindings; explicit catalog/capacity choices are preserved. Reapplying reuses bound services, EventSystems and preview contexts and deduplicates project scene-list registration. To extend capacity, author additional complete roots, raise Maximum Local Players and bind the new entries before applying.
Legacy Text and TextMeshPro (TMP) are separate assignments: use one implementation per label. Optional labels/graphics may remain empty. TMP labels need an authored font asset; the Wizard does not install or change Unity packages.
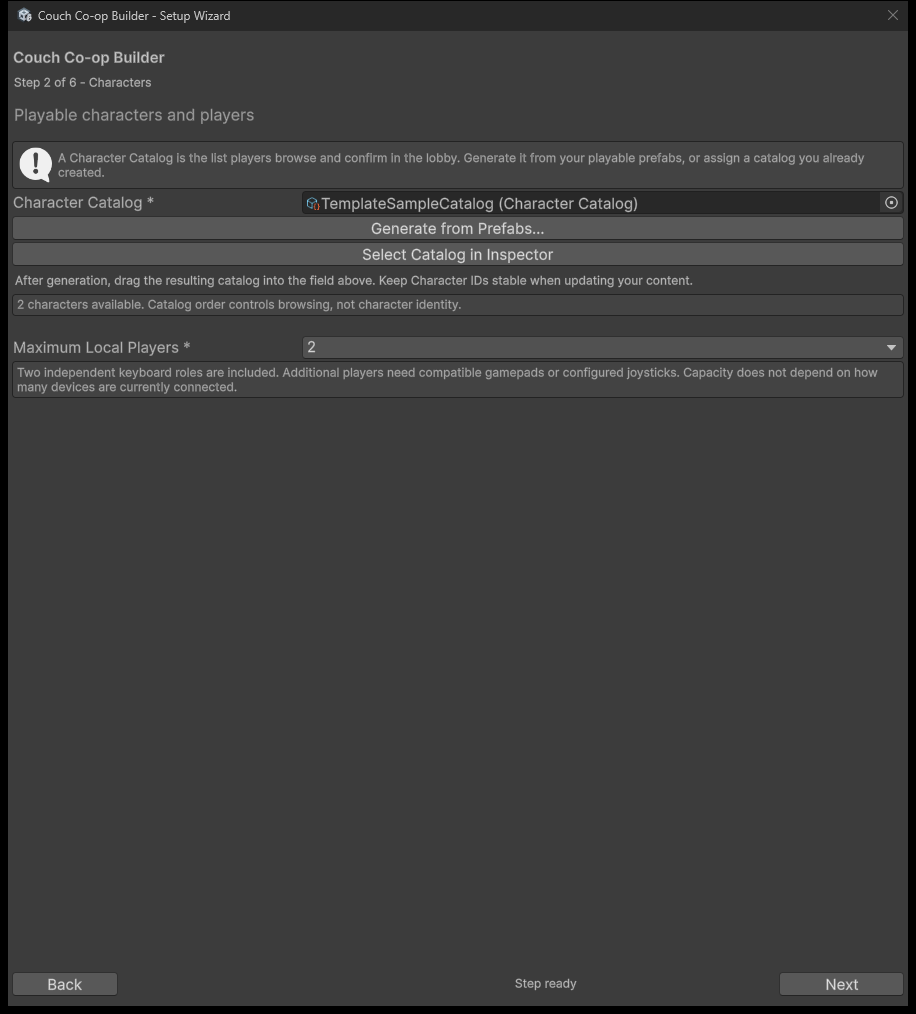
Figure 1. The Characters step assigns a catalog and maximum capacity. Scene UI design remains authored.